哈基鹏的butterfly魔改记录
前言
本文章基于Hexo博客程序的Butterfly主题编写,其中魔改/美化内容大部分来自于各路大神的博客以及网络。
参考:Fomalhaut🥝
记录一:代码设置
代码高亮主题
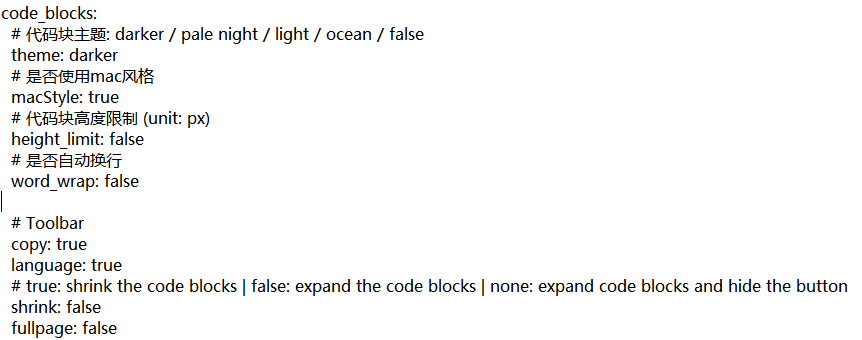
修改代码高亮主题➡️配置文件_config.butterfly.yml中code_blocks列表下的theme属性。
1 | theme: ligh |
Butterfly 支持 4 种代码高亮样式:
1️⃣Light:
2️⃣dacker:

3️⃣pale night:
4️⃣ocean:
如果想要修改成mac风格,可以修改macStyle属性为true
代码复制
修改主题配置文件➡️_config.butterfly.yml中code_blocks列表下的copy属性为true表示可以复制。
1 | copy: true |
代码框展开/关闭
修改主题配置文件➡️_config.butterfly.yml中code_blocks列表下的shrink属性:
1 | shrink: true |
true表示全部代码框不展开,需点击>打开false表示代码框展开,有>点击按钮none表示展开代码块且隐藏按钮
代码框换行
在默认情况下,Hexo 在编译的时候不会实现代码自动换行。如果你不希望在代码块的区域里有横向滚动条的话,那么你可以考虑开启这个功能。修改主题配置文件➡️_config.butterfly.yml中code_blocks列表下的word_wrap属性为true
1 | word_warp: true |
代码高度限制
可配置代码高度限制,超出的部分会隐藏,并显示展开按钮。修改主题配置文件➡️_config.butterfly.yml中code_blocks列表下的height_limit属性:
1 | height_limit: false |
- 单位是
px,直接添加数字,如200 - 实际限制高度为
height_limit+30px,多增加 30 px 限制,目的是避免代码高度只超过height_limit一点时,出现展开按钮,展开没内容。 none表示展开代码块且隐藏按钮
记录二:首页文章布局
首页文章布局可修改主题配置文件➡️_config.butterfly.yml中的index_layout属性,其中包含7种设置:
1 | index_layout: 6 |
- 设置1:封面图在左,信息在右
- 设置2:封面图在右,信息在左
- 设置3:封面图与信息左右交替排列
- 设置4:封面图在上,信息在下
- 设置5:信息直接显示在封面图上
- 设置6:瀑布流布局-封面图在上,信息在下
- 设置7:瀑布流布局-信息直接显示在封面图上
记录三:首页文章摘要显示设置
修改主题配置文件➡️_config.butterfly.yml中的index_post_content下的子属性:
1 | index_post_content: |
其中,method可选择摘要显示方式——1:显示文章描述的description;2:智能显示(存在description则显示,否则显示自动截取的内容);3: 自动截取内容(默认,从前N个字符截取);false:不显示文章摘要。当method为2或3时,length指定截取长度(单位:字符)。
记录四:文章封面
首先在文章的markdown文档上,在Front-matter添加cover,并填上要显示的图片地址:
1 | ------- |
封面图片位置默认存在blog/source/img。如果不配置cover,可以设置显示默认的➡️_config.butterfly.yml;可修改主题配置文件➡️_config.butterfly.yml中的➡️_config.butterfly.yml属性:
1 | cover: |
当配置多张图片时,会随机选择一张作为cover,此时写法应为:
1 | default_cover: |
记录五:Live2d看板娘
1️⃣安装live2d模块:
1 | npm install --save hexo-helper-live2d |
2️⃣添加配置:在_config.yml中添加:
1 | # hexo-helper-live2d |
3️⃣下载Live2d看板娘模型:
由于上述插件只有眼神跟踪鼠标功能,且项目21年已经停止维护,不支持所有版本的Live2D模型。因此,这里使用的是hexo-oh-my-live2d插件(支持.moc && .moc3)。首选要卸载插件和卸载模型,在博客根目录下打开终端,输入:
1 | npm uninstall hexo-helper-live2d #卸载看板娘插件 |
之后我们就可以安装hexo-oh-my-live2d插件:
1 | npm install hexo-oh-my-live2d |
使用本地Live2d的配置:
1 | # _config.yml |
这样就能使用自己下载的模型啦,使用的是这个模型库kongxiangyiren/hexo-oh-my-live2d。目前有个bug就是点击模型切换是会直接加载失败,原因未知,我本地只有一个live2d模型,后续发现问题了再更新。一旦不小心切换了把网站的所有cookies清除,再重新进网页就能解决。
记录六:背景一图流
首先,设置网站背景,修改主题配置文件➡️_config.butterfly.yml中的background下的子属性:
1 | background: https://amadeuspjq.cn/img/background.jpg |
比如,我现在的网站是 https://amadeuspjq.cn,那么填写的地址就是网站+你引用在本地图片的目录(/img/background.jpg)。如果你的网站根目录不是’/‘,使用本地图片時,需要加上你的根目录。例如:网站是 https://yoursite.com/blog,引用一張img/xx.png圖片,則設置 background 為 /blog/img/xx.png
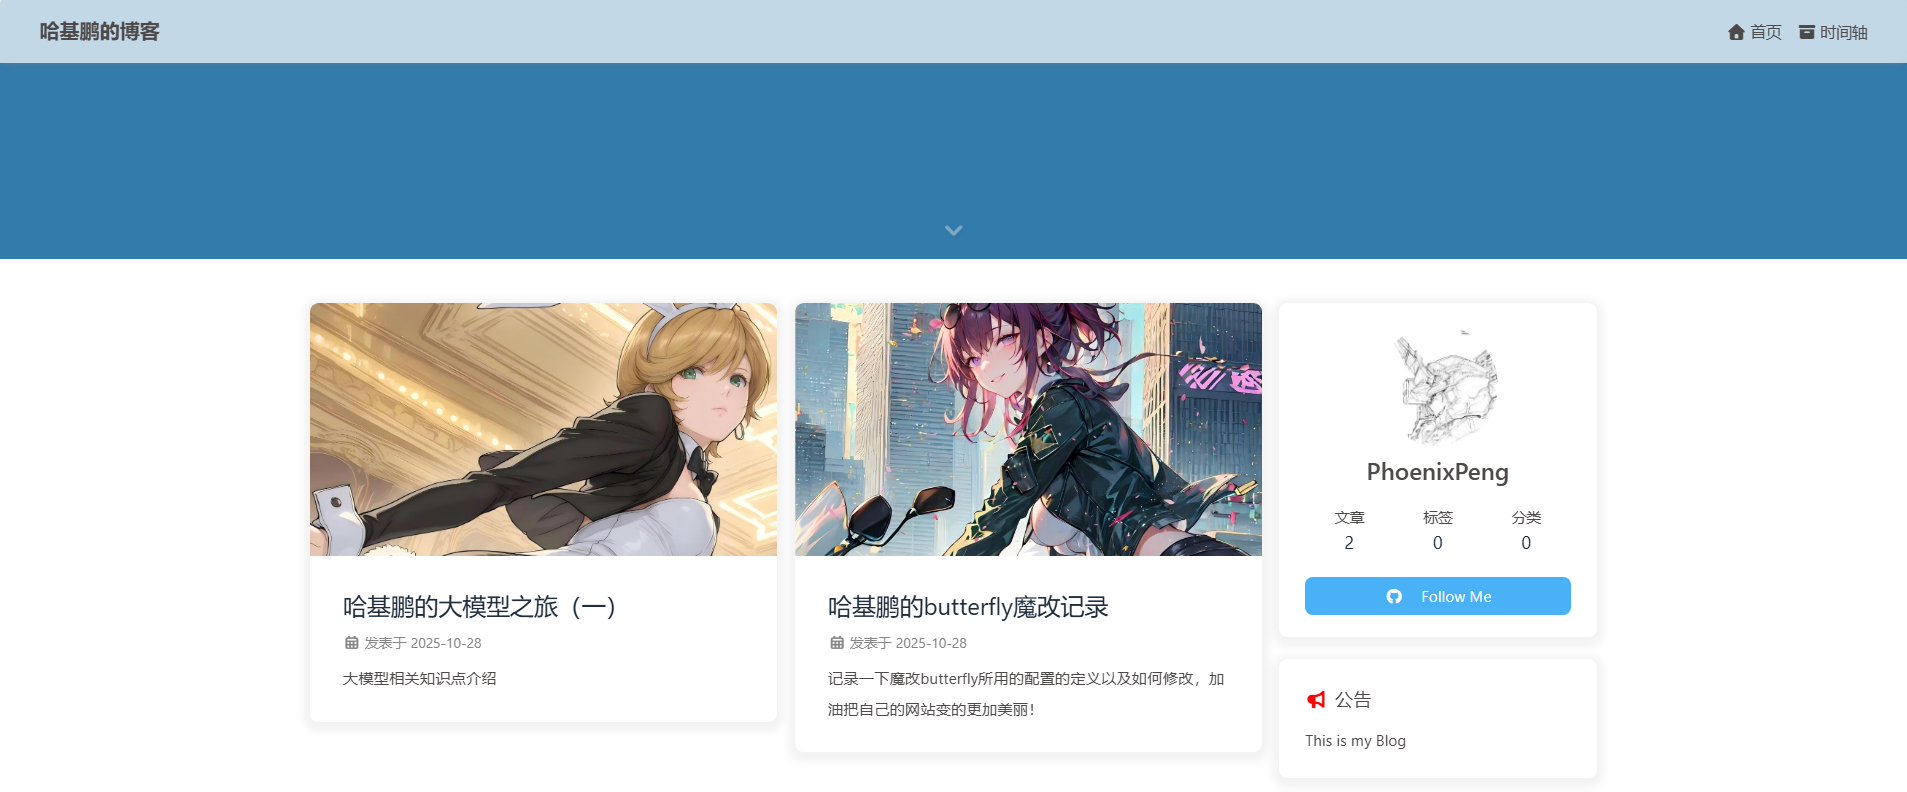
当你设置好了以后,你会发现你的网站背景被页面头部图遮住(我遐蝶的头看不到我要疯掉啦!!!):
并且页脚这里也是有遮蔽的:

所以,才需要一图流的制作,由于是我独自摸索网上各位大佬的教程,有很多地方不太懂,需要自己独自尝试。网上很多教程都是一步到位直接给你弄好,不细致做的话,有些问题的出现你根本不知道原因。
想要移除首页的顶部图很简单,你只需要关注一个参数➡️_config.butterfly.yml中的index_img:
| 配置的值 | 效果 |
|---|---|
| 留空 | 显示默认的top_img(如果有),否则显示默认的颜色 |
| img链接 | 图片的链接,显示所配置的图片 |
| 颜色(HEX 值 - #0000FF;RGB 值 - rgb(0,0,255);顔色單詞 - orange;漸變色 - linear-gradient( 135deg, #E2B0FF 10%, #9F44D3 100%)) | 对应颜色 |
| transparent | 透明 |
| false | 不显示 top_img |
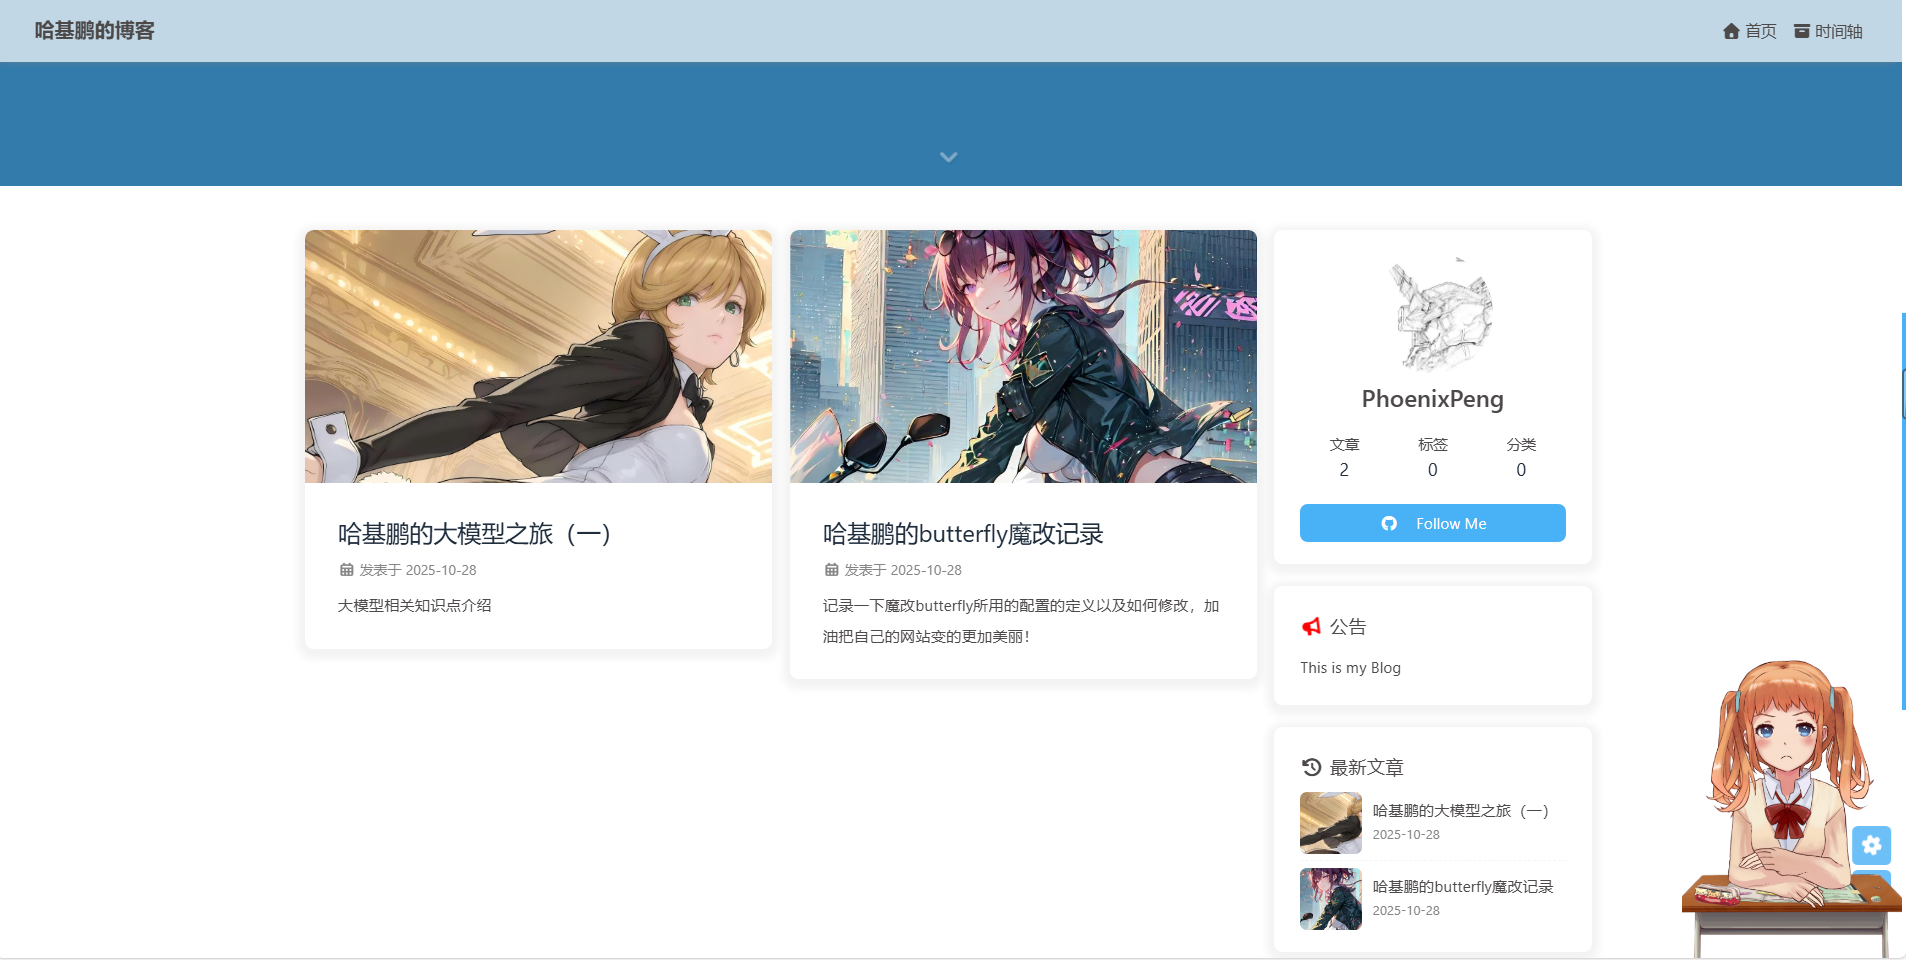
因此,你只需设置index_img: transparent就可以把网站背景图显示出来。
页脚背景图同理,修改➡️_config.butterfly.yml中的footer_img:
1 | footer_img: transparent |
注意当设置footer_img:true表示显示跟top_img 一样。如果直接这两个参数直接false,是直接没有top_img图:
如果你觉得首页顶部图太高了,也可以调节它的高度:
1 | index_top_img_height: 400px |
这样,你一打开网页就不会被主页首部图占整个屏幕:
如果你不想要这种半透明效果,想要直接全透明,可以修改➡️_config.butterfly.yml中的mask列表下的header:
1 | # true 表示添加遮罩;header是头部图,footer是页脚图 |

后续,可以将首页以外的顶部图移到标题下方显示:
🎻新建Styl文件
在 ROOT\themes\butterfly\source\css\page目录,新建 topimg.styl。
1 | // 顶部图 |
🎹修改post.pug
在 ROOT\themes\butterfly\layout目录,新建 post.pug。
1 | block content |

记录七:修改鼠标样式
参考链接:Hexo 修改鼠标样式
首先可以选中自己喜欢的鼠标指针样式,推荐到致美化网站进行下载。
之后将 .cur格式的鼠标指针图片放入到博客根目录下的\blogroot\source\mouse的路径下。
注意如果你下载到的是.ani格式的动态鼠标指针图片,那么需要转换成静态鼠标格式.cur,不然无法加载,转换方法:电脑指针ani格式转换成cur格式。另外想要调整鼠标指针样式大小也是前面这个链接下载对应的软件进行调整。

之后,在本地css目录下创建custom.css并将以下代码复制粘贴到custom.css中进行保存:
1 | /* 全局默认鼠标指针 */ |
根据自己的需求,你需要哪些功能设置什么样的鼠标指针样式就对应添加。之后,在主题配置文章_config.butterfly.yml中找到inject属性,并在head处引入该文件:
1 | inject: |
然后hexo三连重新部署后就能看到鼠标生效效果。
记录八:文章内容标题前缀图标

修改主题配置文件➡️_config.butterfly.yml中的beautify下的子属性:
1 | beautify: |
enable:是否启用内容美化field:应用范围:site(全站)/ post (仅文章)title_prefix_icon:标题前缀图标(使用Font Awesome的Unicode值,对照表:Font Awesome 图标库所有版本UNICODE对照表大全 )title_prefix_icon_color:标题前缀图标颜色
记录九:首页分类磁贴1.0(小冰)
首先,需要在博客根目录下安装hexo-magnet插件:
1 | npm i hexo-magnet --save |
注意,一定要加--save,不然本地预览的时候可能不会显示!!!
然后,新增网站根目录_config配置项(不是主题的):
1 | magnet: |
参数含义:
| 参数 | 备选值 | 释义 |
|---|---|---|
| enable | true/false | 是否开启插件 |
| enable_page | / | 所应用的页面地址。如/代表主页 |
| priority | 1 | 插件的叠放顺序,数字越大,叠放约靠前。如果你安装了 hexo-githubcalendar,请将hexo-githubcalendarnpm 插件更新至@1.2.3版本。然后给 hexo-githubcalendar 添加priority参数。 |
| type | categories/tags | 选择筛选分类还是标签 |
| devide | 2 | 表示分隔的列数,2 表示分为两列展示 |
| display.name | 这里是文章的tags或categories的名称 | |
| display.display_name | 这里是替换的名称 | |
| display.icon | 这里是展示的图标 | |
| color_setting.text_color | back | 文字默认颜色 |
| color_setting.text_hover_color | white | 文字鼠标悬浮颜色 |
| color_setting.background_color | “#f2f2f2” | 文字背景默认颜色 |
| color_setting.background_hover_color | “#b30070” | 文字背景悬浮颜色 |
| layout.type | id&class | 墙 |
| layout.name | recent-posts | 墙的名字 |
| layout.class | 1 | 在多个class的情况下,确定是哪一个 |
| temple_html | html模板字符 | 包含挂载容器 |
| plus_style | “” | 提供可自定义的style,如加入黑夜模式 |
效果预览:

记录十:hexo-abbrlink(短链)
Hexo默认的静态URL格式是 :year/:month/:day/:title,即按年、月、日、标题的形式生成固定链接,如果文章的标题使用了中文,经过转码后,URL会变得特别长。生成短链就是这个插件的作用。
例如:
优化后:
https://www.xxx.com/posts/b40f8ae4.html
首先,安装插件:
1 | npm install hexo-abbrlink --save |
修改_config.yml下的permalink属性:
1 | permalink: posts/:abbrlink.html |
_config.yml中支持的两种写法
1 | permalink: posts/:abbrlink/ |
并在_config.yml配置文件中添加下面的配置信息:
1 | # abbrlink config 哈希url路径 |
有两种设置:
alg——算法(目前支持crc16和crc32,默认为crc16)rep——表示(生成的链接可以用十六进制或十进制值表示)
效果预览:

记录十一:首页文字轮播动画效果
效果预览:
首先安装插件:
1 | npm install hexo-butterfly-swiper --save |
在_config.yml配置文件中添加下面的配置信息:
1 | # hexo-butterfly-swiper |
之后,在文章的_config.yml当中添加swiper_index配置项即可:
1 | --- |
记录十二:Butterfly 外挂标签用法
🦀行内文本样式
1.带 下划线 的文本
2.带
3. 带
4.带 删除线 的文本
5.键盘样式的文本 command + D
6.密码样式的文本:
🐟行内文本 Span
配置参数:
1 | 语法: {% span 样式参数(参数以空格划分),文本内容%} |
字体: logo, code颜色: red,yellow,green,cyan,blue,gray大小: small,h4,h3,h2,h1,large,huge,ultra对齐方向: left, center, right
彩色文本:
在一段话中方便插入各种颜色的标签,包括红色、黄色、绿色、青色、蓝色、灰色。
超大号文字:
文档「开始」页面中的标题部分就是超大号文字。
路飞
我要成为海贼王的男人!
🐬折叠框 folding
配置参数:
1 | {% folding 参数(可选),标题 %}内容(可以是文本也可以是图片){% endfolding %} |
颜色: red,yellow,green,cyan,blue,gray状态: 状态填写open代表默认打开
这是一个默认打开的折叠框。 查看默认打开的折叠框
查看图片测试
🐳外部icon(提示块标签)
1 | {% note [color] [icon] [style] %} |
| 参数 | 用法 |
|---|---|
| color | 【可选】标识,不同的标识有不同的配色 ( default / blue / pink / red / purple / orange / green ) |
| no-icon | 【可选】可配置自定义 icon (只支持 fontawesome 图标, 也可以配置 no-icon ) |
| style | 【可选】可以覆盖配置中的 style (simple/modern/flat) |
simple样式预览和代码:
1 | {% note 'fab fa-cc-visa' simple %}你是刷 Visa 还是 UnionPay{% endnote %} |
你是刷 Visa 还是 UnionPay
2021年快到了….
小心开车 安全至上
这是三片呢?还是四片?
你是刷 Visa 还是 UnionPay
剪刀石头布
前端最讨厌的浏览器
modern样式预览和代码:
1 | {% note 'fab fa-cc-visa' modern %}你是刷 Visa 还是 UnionPay{% endnote %} |
你是刷 Visa 还是 UnionPay
2021年快到了….
小心开车 安全至上
这是三片呢?还是四片?
你是刷 Visa 还是 UnionPay
剪刀石头布
前端最讨厌的浏览器
flat样式预览和代码:
1 | {% note 'fab fa-cc-visa' flat %}你是刷 Visa 还是 UnionPay{% endnote %} |
你是刷 Visa 还是 UnionPay
2021年快到了….
小心开车 安全至上
这是三片呢?还是四片?
你是刷 Visa 还是 UnionPay
剪刀石头布
前端最讨厌的浏览器
no-icon样式预览和代码:
1 | {% note no-icon %}你是刷 Visa 还是 UnionPay{% endnote %} |
🦈复选列表 checkbox
配置参数:
1 | 标签语法: {% checkbox 样式参数(可选),文本(支持简单md)%} |
样式: plus, minus, times颜色: red,yellow,green,cyan,blue,gray选中状态: checked
纯文本测试
支持简单的 markdown 语法
支持自定义颜色
绿色 + 默认选中
黄色 + 默认选中
青色 + 默认选中
蓝色 + 默认选中
增加
减少
叉
🐙单选列表 radio
配置参数:
1 | {% radio 样式参数(可选),文本(支持简单md)%} |
颜色: red,yellow,green,cyan,blue,gray选中状态: checked
纯文本测试
支持简单的 markdown 语法
支持自定义颜色
绿色
黄色
青色
蓝色
🦪链接卡片 link
配置参数:
1 | {% link 标题, 链接, 图片链接(可选) %} |

记录十三:添加相册和音乐页
(一)插件的安装与配置
1.安装 hexo-tag-aplayer 插件
1 | npm install --save hexo-tag-aplayer |
2.配置插件
找到项目文件夹根目录下的 _config.yml文件,添加如下代码:
1 | aplayer: |
之后打开 _config.butterfly.yml 文件,进行修改,这是为了引入刚才下载的插件。
1 | # Inject the css and script (aplayer/meting) |
(二)音乐页面
1.创建页面
如果还没有创建音乐页面,那就用以下命令创建:
1 | hexo new page music |
运行之后就会在source文件夹下生成一个music文件夹:
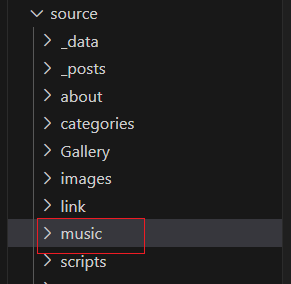
打开music文件夹下的index.md文件,添加如下代码:
1 | {% meting "17548816441" "netease" "playlist" "autoplay" "mutex:false" "listmaxheight:400px" "preload:none" "theme:#ad7a86"%} |
MetingJS 是基于Meting API 的 APlayer 衍生播放器,引入 MetingJS 后,播放器将支持对于 QQ音乐、网易云音乐、虾米、酷狗、百度等平台的音乐播放。
有关 {% meting %} 的选项列表如下:
| 选项 | 默认值 | 描述 |
|---|---|---|
| id | 必须值 | 歌曲 id / 播放列表 id / 相册 id / 搜索关键字 |
| server | 必须值 | 音乐平台: netease, tencent, kugou, xiami, baidu |
| type | 必须值 | song, playlist, album, search, artist |
| fixed | false |
开启固定模式 |
| mini | false |
开启迷你模式 |
| loop | all |
列表循环模式:all, one,none |
| order | list |
列表播放模式: list, random |
| volume | 0.7 | 播放器音量 |
| lrctype | 0 | 歌词格式类型 |
| listfolded | false |
指定音乐播放列表是否折叠 |
| storagename | metingjs |
LocalStorage 中存储播放器设定的键名 |
| autoplay | true |
自动播放,移动端浏览器暂时不支持此功能 |
| mutex | true |
该选项开启时,如果同页面有其他 aplayer 播放,该播放器会暂停 |
| listmaxheight | 340px |
播放列表的最大长度 |
| preload | auto |
音乐文件预载入模式,可选项: none, metadata, auto |
| theme | #ad7a86 |
播放器风格色彩设置 |
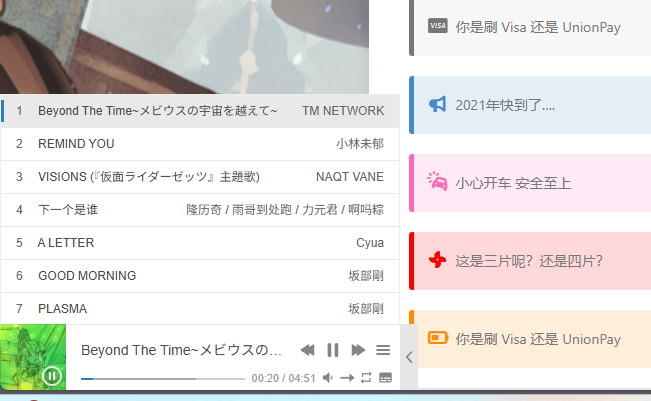
server:netease(网易云音乐),tencent(QQ音乐),kugou(酷狗音乐),xiami(虾米音乐),baidu(百度音乐)。
type:song(歌曲),playlist(歌单),album(专辑),search(搜索关键字),artist(歌手)。添加单曲选的歌曲,歌单选择playlist,可以自行尝试。
id:就是在网页版上自己歌单的ID号,但是需要注意的是歌单中不能包含VIP音乐,不然无法播放。

2.全局吸底Aplayer模式
在 _config.butterfly.yml文件中修改如下:
1 | inject: |
其中里面的参数都可以根据自己需要进行修改
如果想切换页面时,音乐不会中断,就在_config.butterfly.yml文件中 pjax 修改为 true
1 | pjax: |
效果预览:
(三)相册页面
1.创建页面:
执行如下命令:
1 | hexo new page Gallery |
就会在项目文件夹的/source下生成/Gallery/index.md文件。
注意:”Gallery” 名字一定要跟之前创建的导航栏中的名字一样,不然无法跳转。
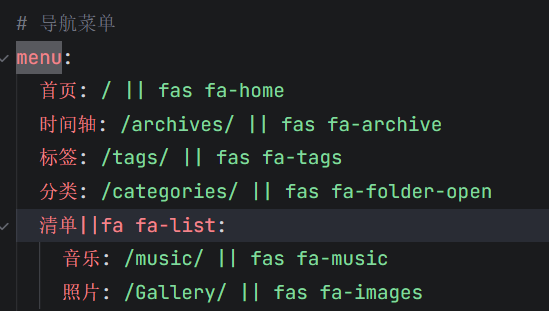
这时就可以点击首页导航栏中的“照片”进入,此刻还什么都没添加,所以只是空白页。
2.图库集合页
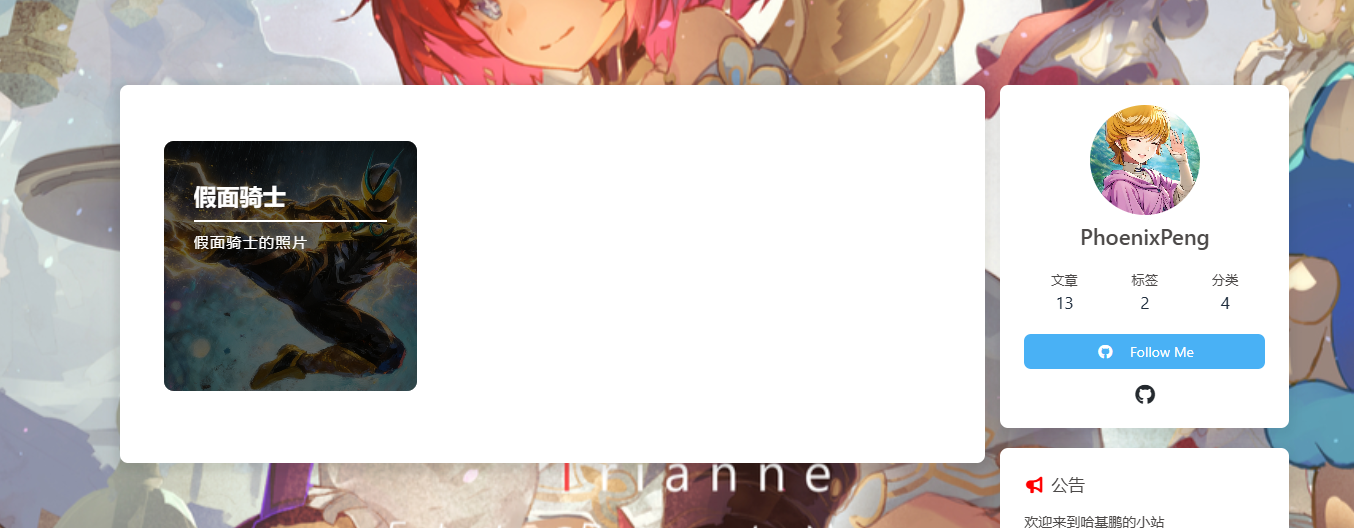
图库集合页相当于对照片进行分类的一个页面,在/Gallery/index.md中
1 | <div class="gallery-group-main"> |
这里面每个galleryGroup中设置的内容如下:
- name:图库名字
- description:图库描述
- link:链接到对应相册的地址
- img-url:图库封面的地址
例如,可以这样设置:
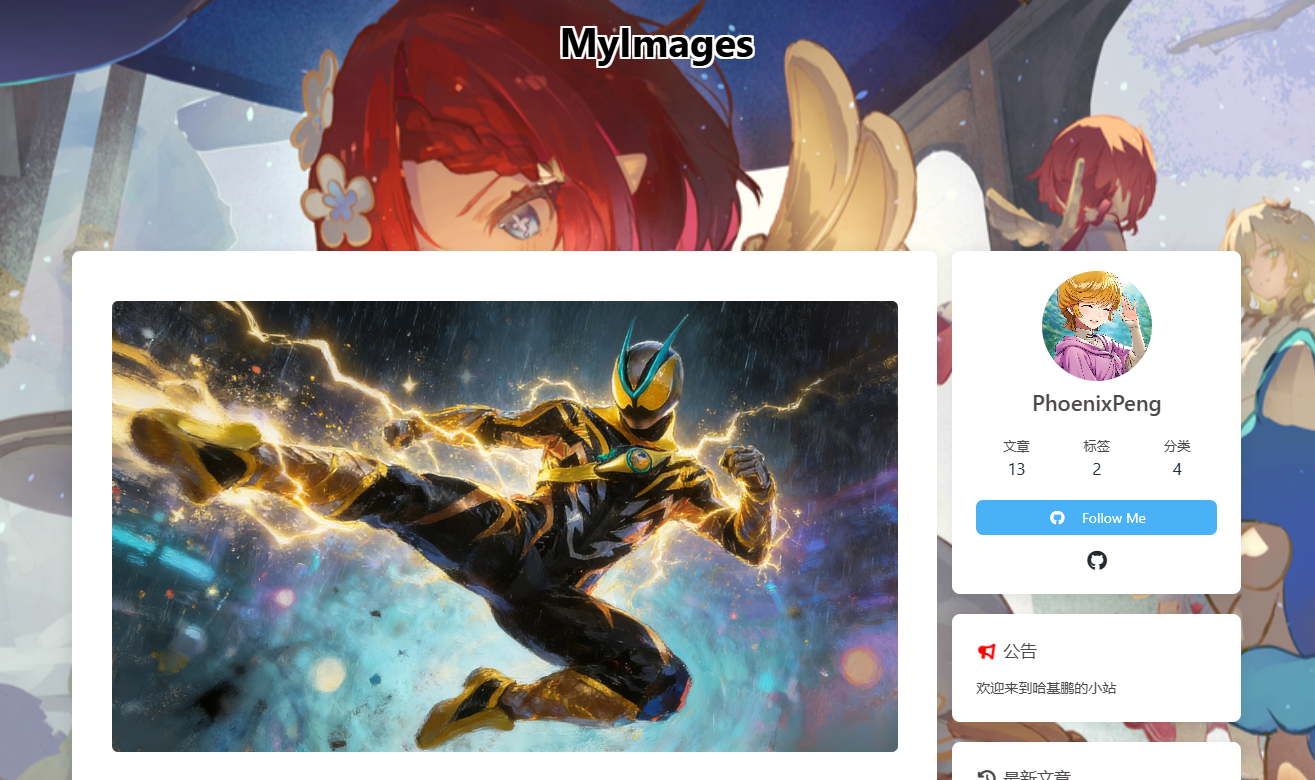
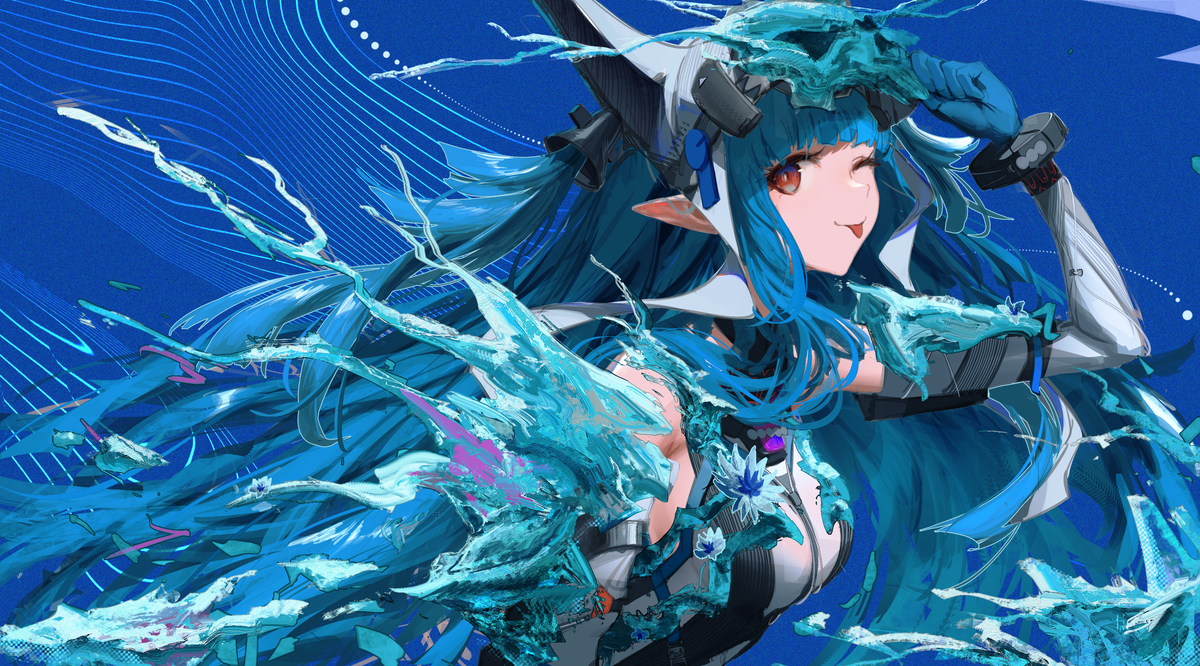
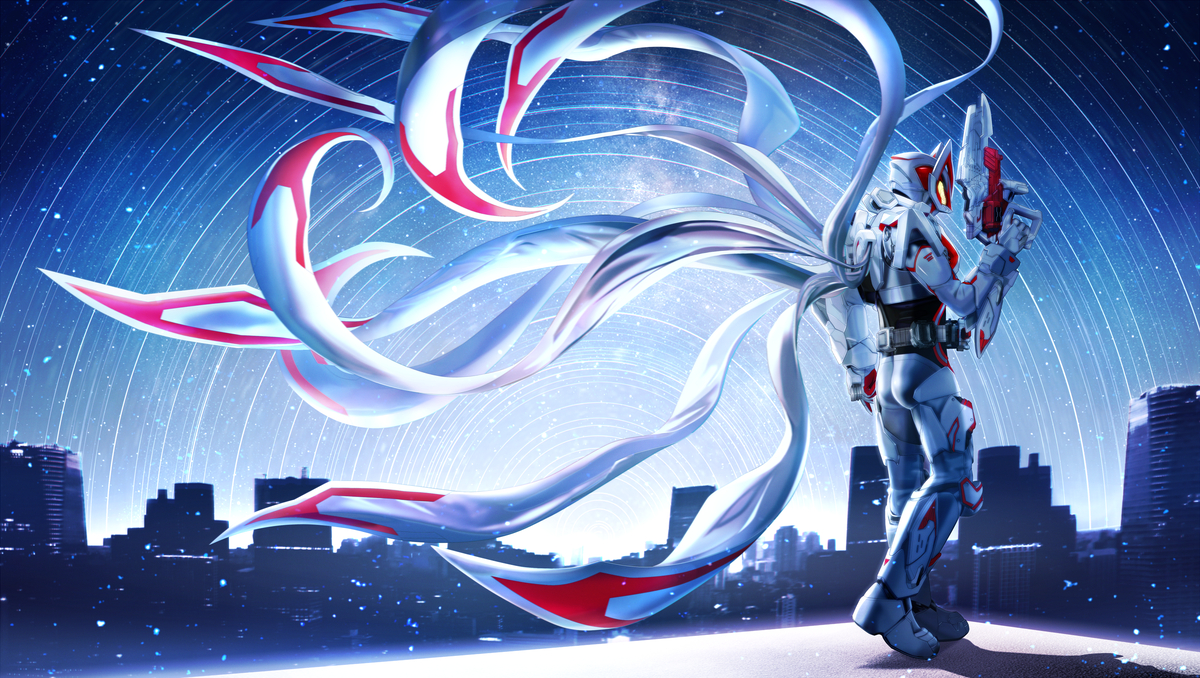
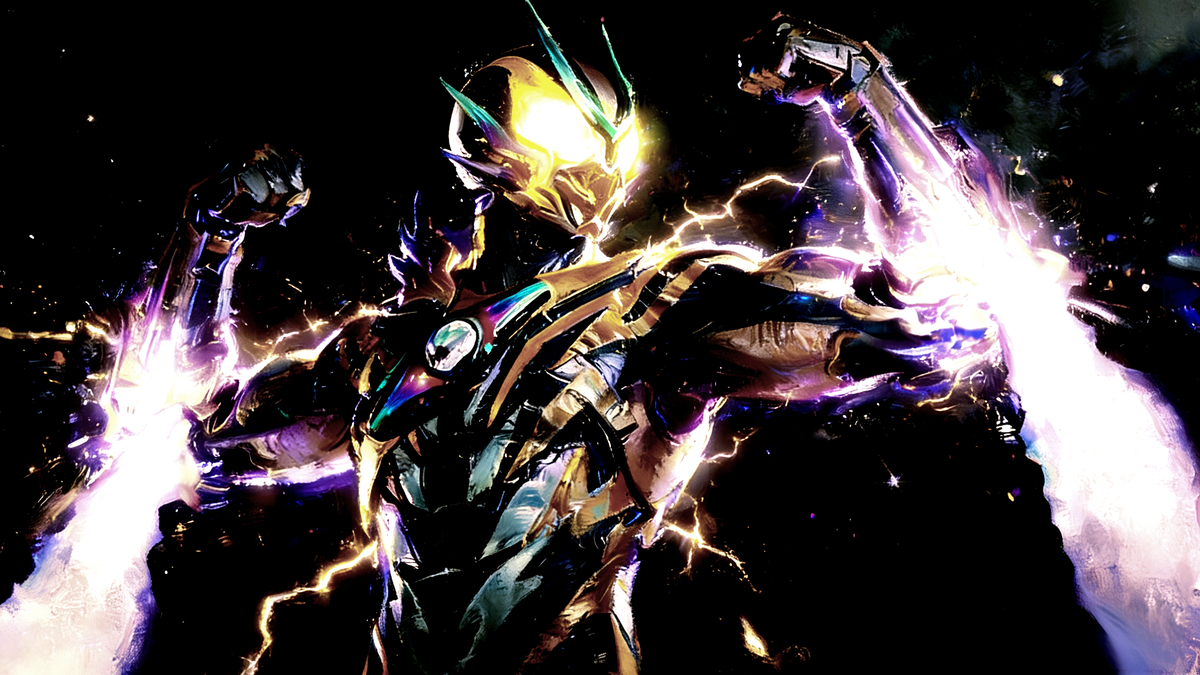
1 | {% galleryGroup '假面骑士' '假面骑士的照片' '/Gallery/MyImages' '/Gallery/MyImages/image.png' %} |
效果预览:
3.图库子页面
点击上一个创建的图库集合页,就会跳转到这个页面,里面存放着各自分类下的照片。也跟之前一样,需要创建一个新的页面
1 | hexo new page MyImages |
但是现在/source/MyImages/index.md与/source/Gallery/index.md 是平级的,所以要将/MyImages整个文件夹复制到/Gallery里面去,这样就可以实现跳转了。
然后在/MyImages/index.md中进行设置:
1 | {% gallery %} |
效果预览: